

Web search and fetching (TinyFish)
Models can’t browse the web on their own. To let Pine’s AI search the web and read page contents, you also need a TinyFish API key. This step is optional, but strongly recommended.
Step 1: Sign up and sign in
- Open agent.tinyfish.ai.
- You can sign up with GitHub, Google, Microsoft, an X account, or email.
- If a cookie notice appears at the bottom of the page, choose according to your preference.
Step 2: Skip the onboarding
- A new account lands on a “Connect TinyFish” onboarding page that asks you to copy a “setup prompt” to some AI agent.
- Pine doesn’t need this step; just click Skip setup at the top right.
The setup prompt on that onboarding page contains your full API key. Don’t screenshot or share it.
Step 3: View and copy the key
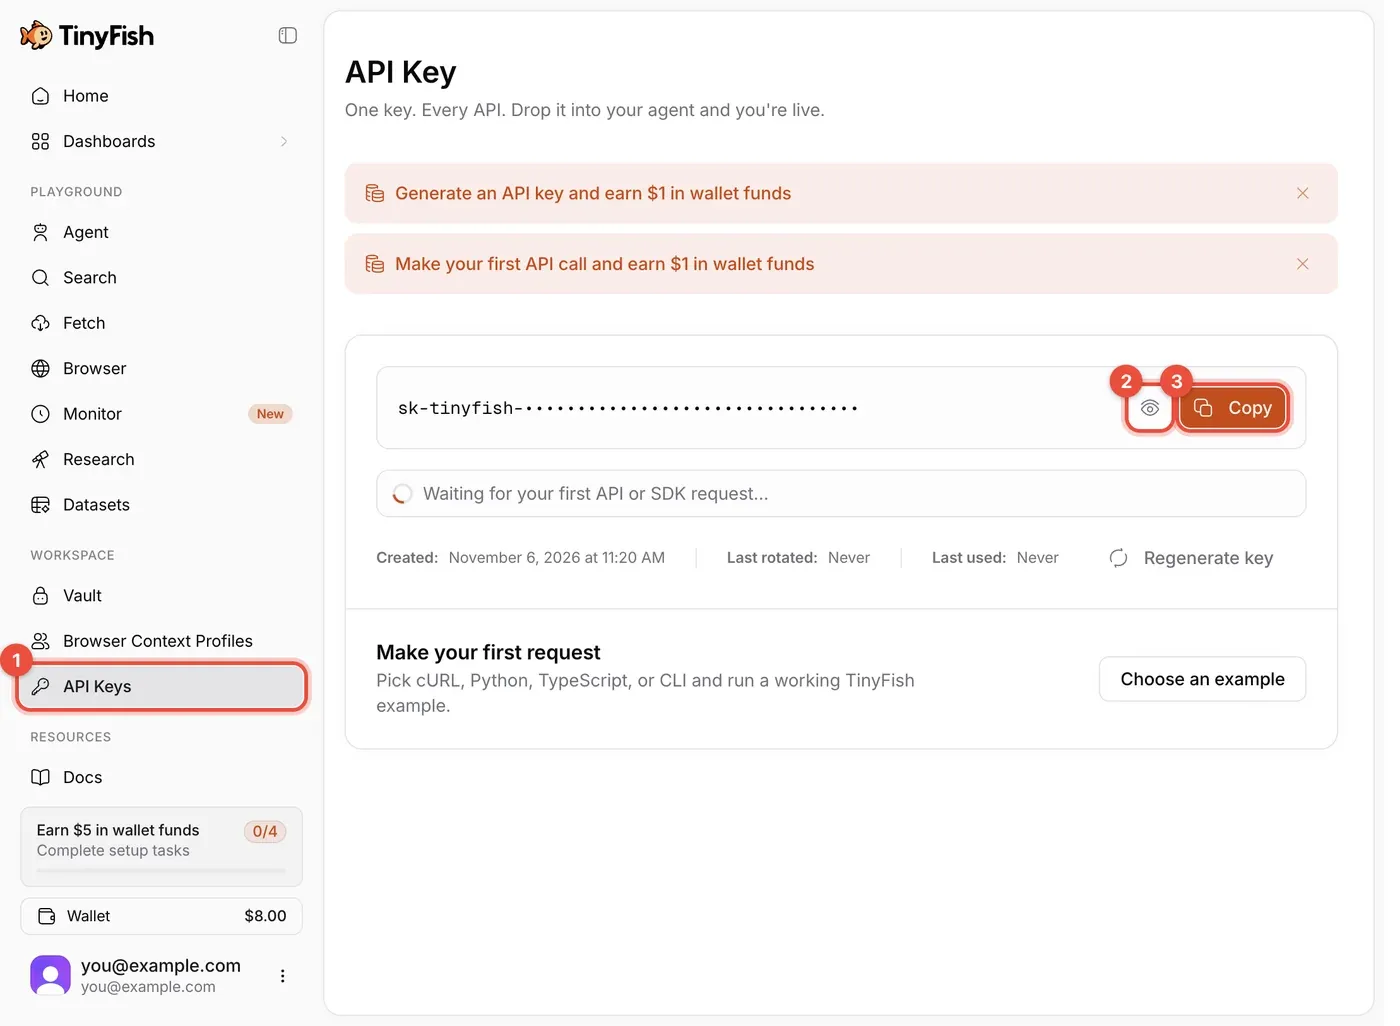
- Click API Keys on the left (①). A new account gets a key automatically, hidden by default.
- Click the eye icon (②) to reveal it.
- Click Copy (③) to copy it.
Step 4: Enter it in Pine
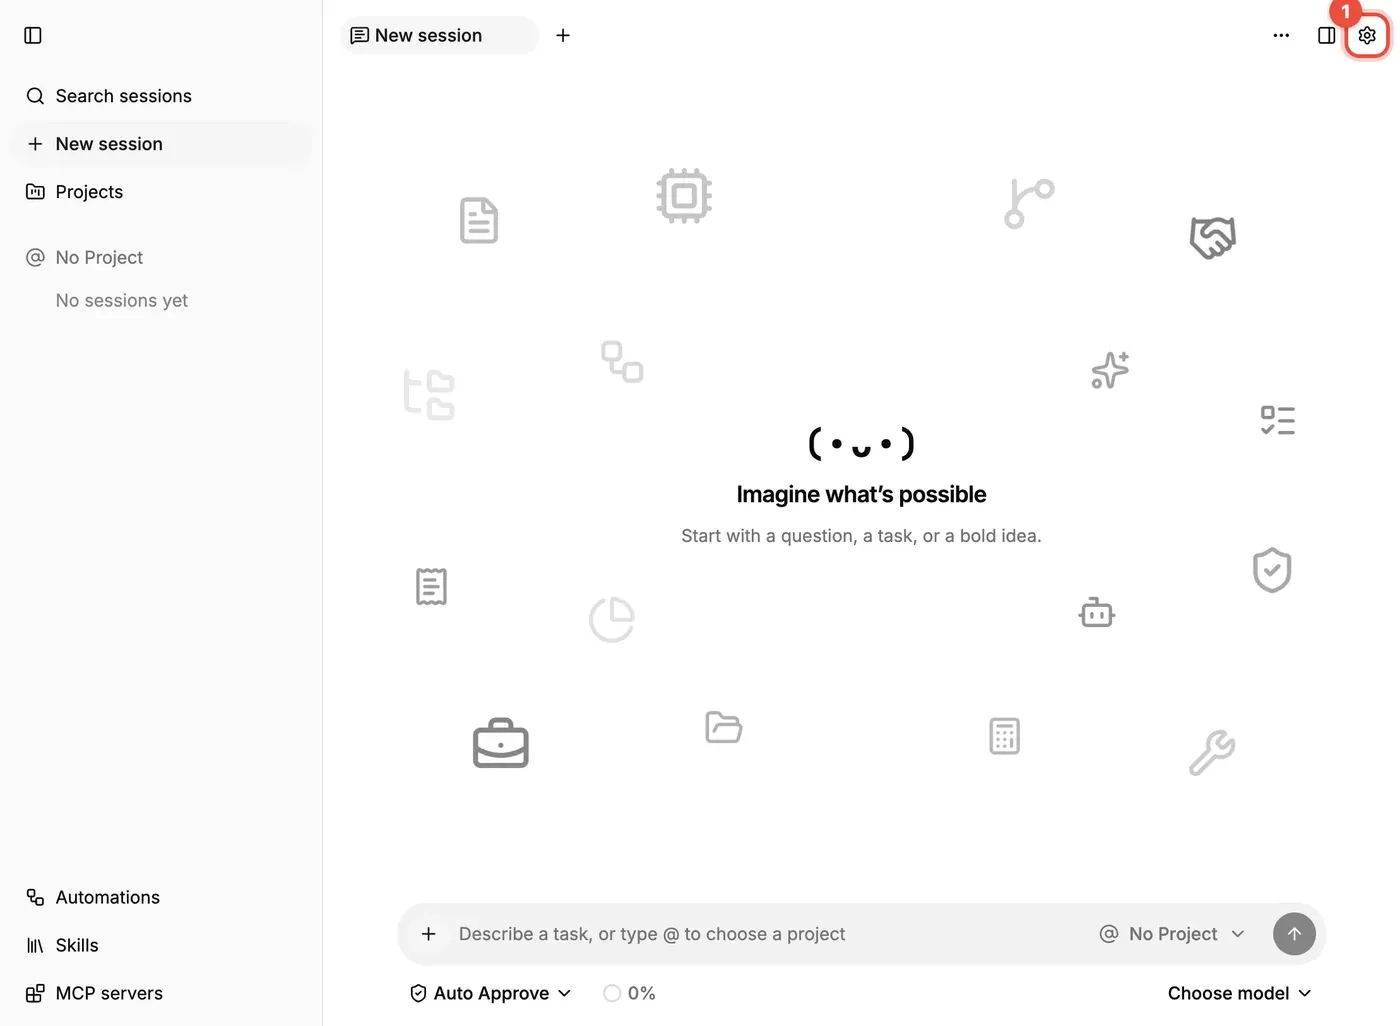
- Click the gear Open Pine settings at the top right of Pine (①):
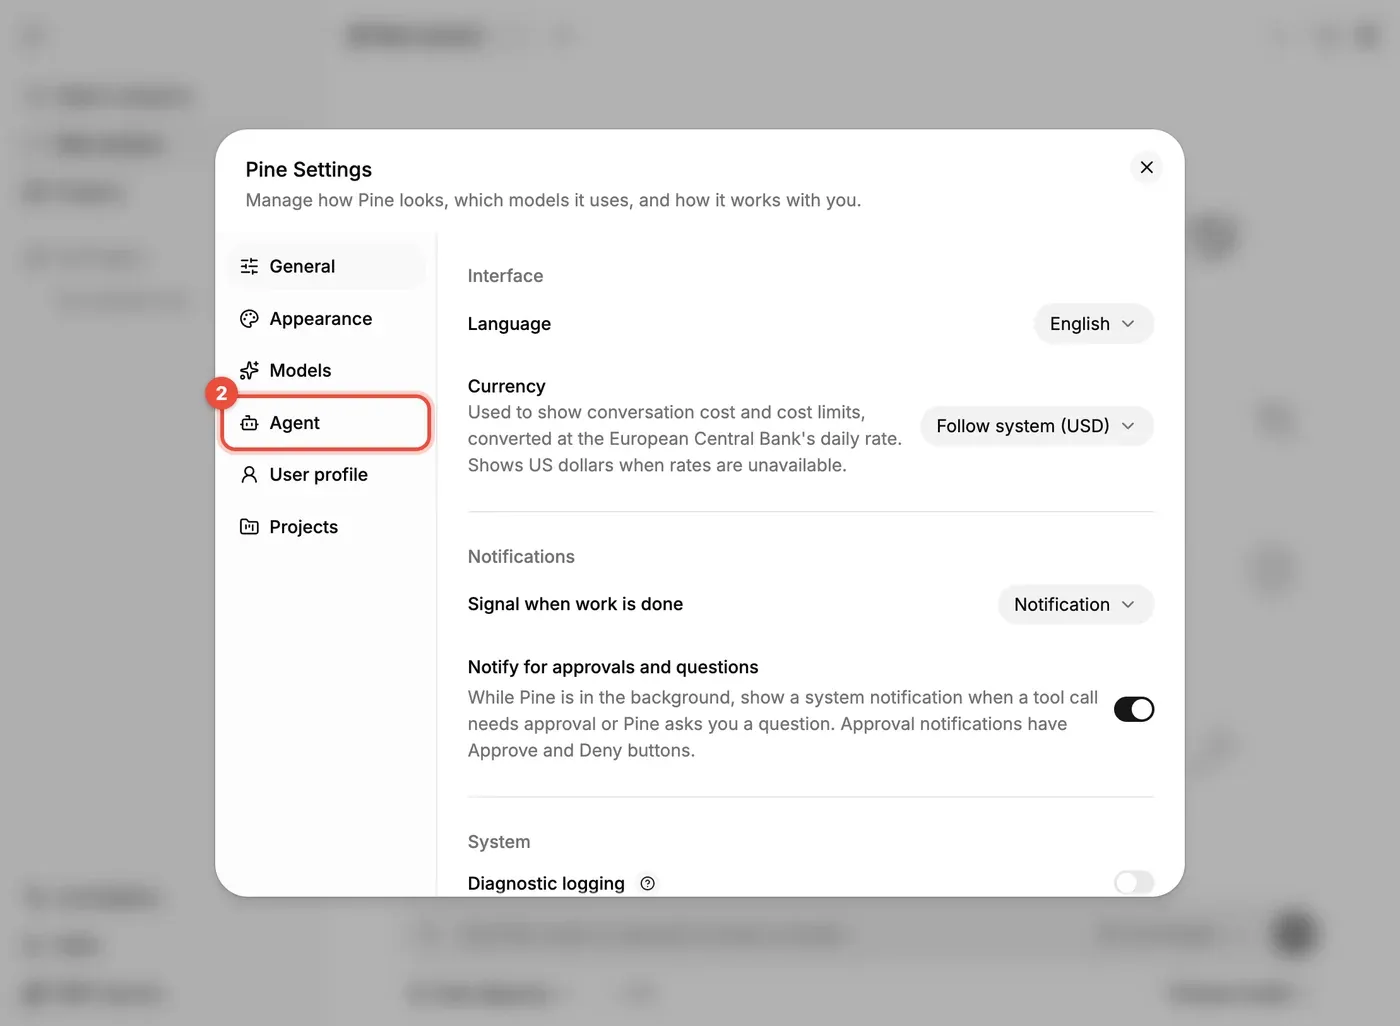
Click Agent on the left (②):
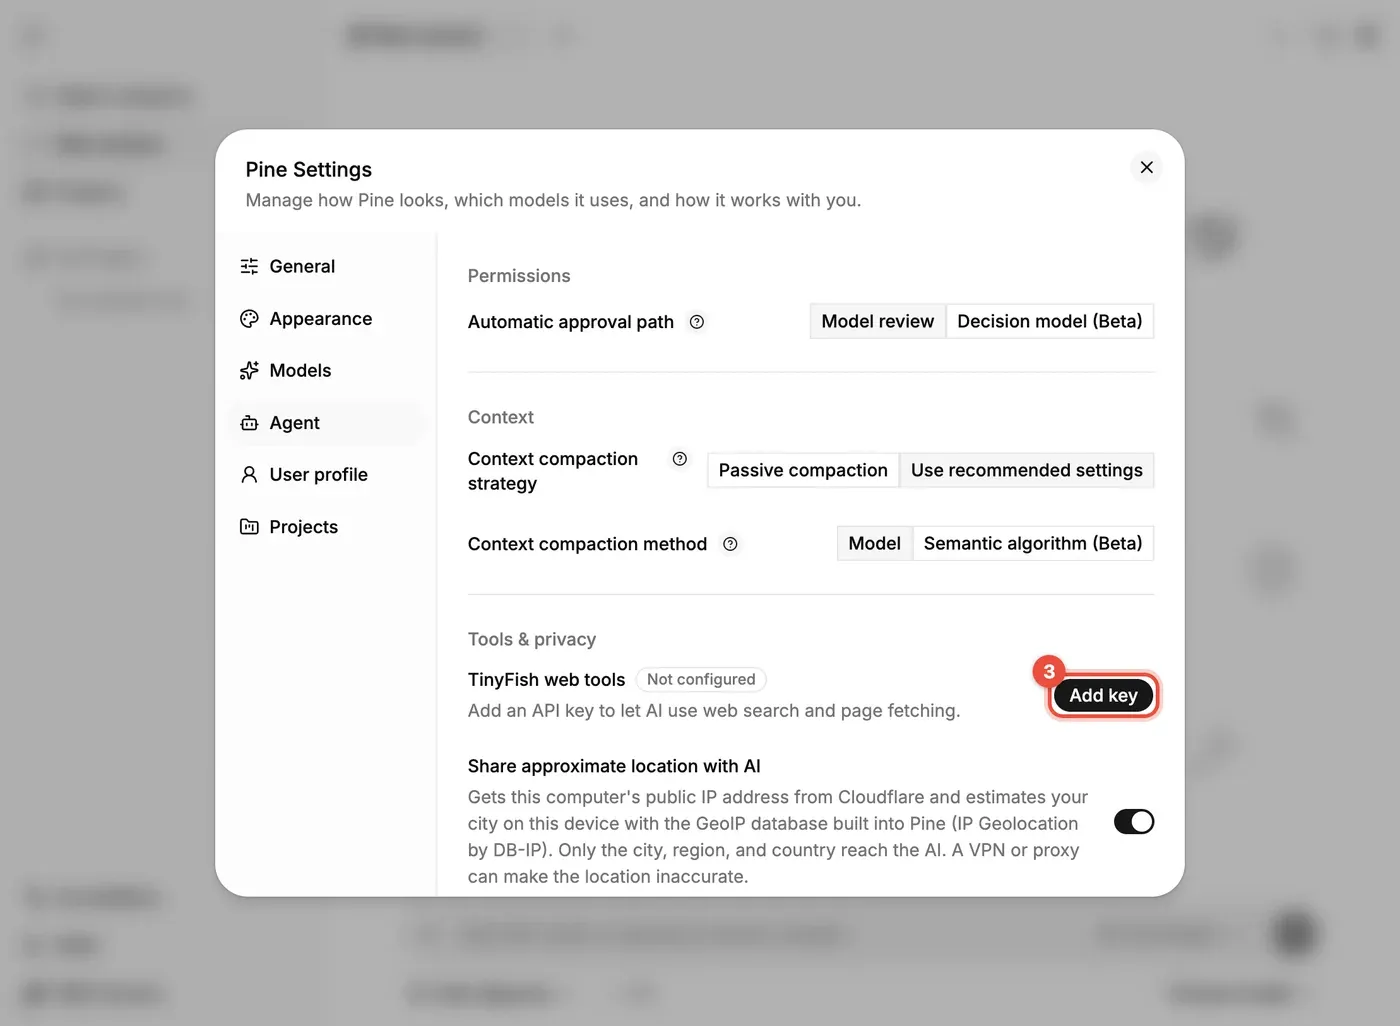
Scroll to Tools & privacy, find TinyFish web tools (currently Not configured), and click Add key (③):
In the Set TinyFish API key dialog, paste the key (④) and click Save key (⑤):
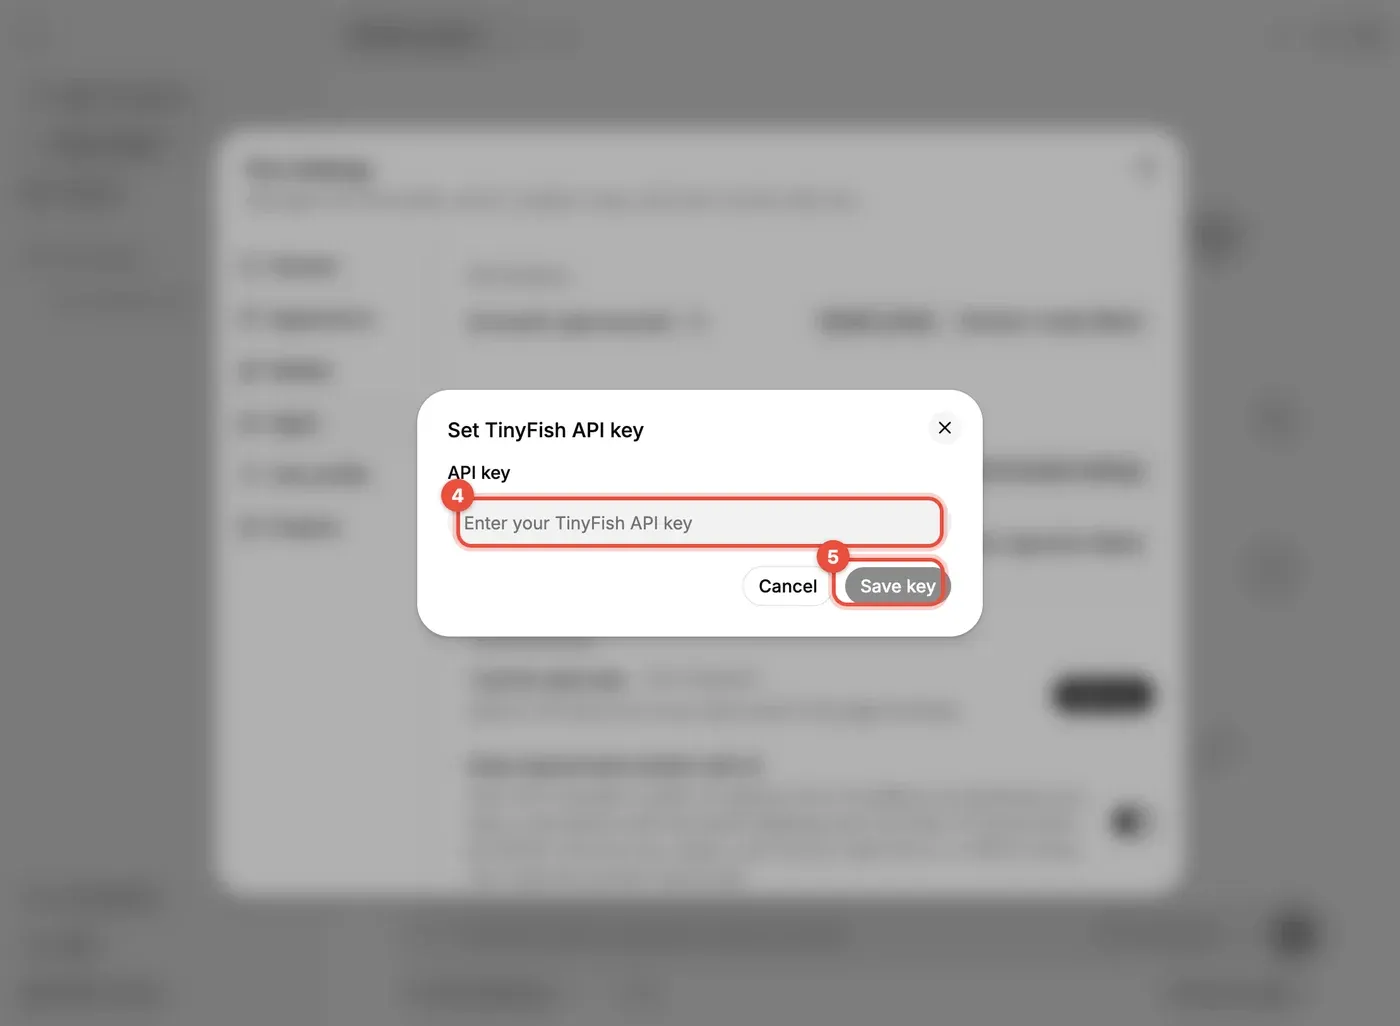
After saving, the status changes to Configured, and the AI can use web search and page fetching. Try it: in a session, ask “Search for today’s news about something and summarize it.”
- TinyFish states that Search and Fetch have a free allowance, with a requests-per-minute limit on the free tier. For exact allowances and prices, see the TinyFish docs and its pricing page.
- To change the key later, go back to the same place and click Change key.
- The same security rule as any API key applies: don’t share it. If it leaks, click Regenerate key on TinyFish’s API Keys page and enter the new key in Pine.